Showing posts with label Recipe. Show all posts

Monday, January 27, 2020

Food Frenzy and Fun!


This is a story of when the excitement of making a "side dish/ a dip" decided the entire main course menu.

Miss V is currently on a rotation class at her school for Home Economics. A part of her curriculum was focused on fun recipes. She has been excitedly sharing this with us.  So on a nice Saturday Morning, as we chat what to make for lunch.?She chimes in, "I want to make Hummus" Hmm, so we changed the menu and being the(awesome) supportive parents decided to make a Mediterranean Meal instead!

What a feat.

I have made falafel before and I did want to try the Air Fryer! For hummus however I leaned in on Miss V. She looks up the recipe, on a cold snowy morning we head to the stores, get what we need and ta-da!!!

Our platter was quiet significant
4 types of Hummus
  1. Roasted Red Pepper Hummus
  1. Roasted Serrano Pepper Hummus
  1. Original Hummus
  1. Olive Hummus
Pita
Salad
Yogurt Dip

A picture just to make you salivate a bit! And yes, it was delish!!!

Cooking with Chatter Box and Little Lady  is always fun. But of course, She lost her temper more than a few times since "I was not following instructions", I was on the edge a few times since "The kitchen looked like a war zone".
In the middle we called truce and decided to experiment! And hence the 4 different types of hummus!

The recipe should come from her, so I will have a guest post sometime soon!

But all in all, a delish meal and a wonderful experience.
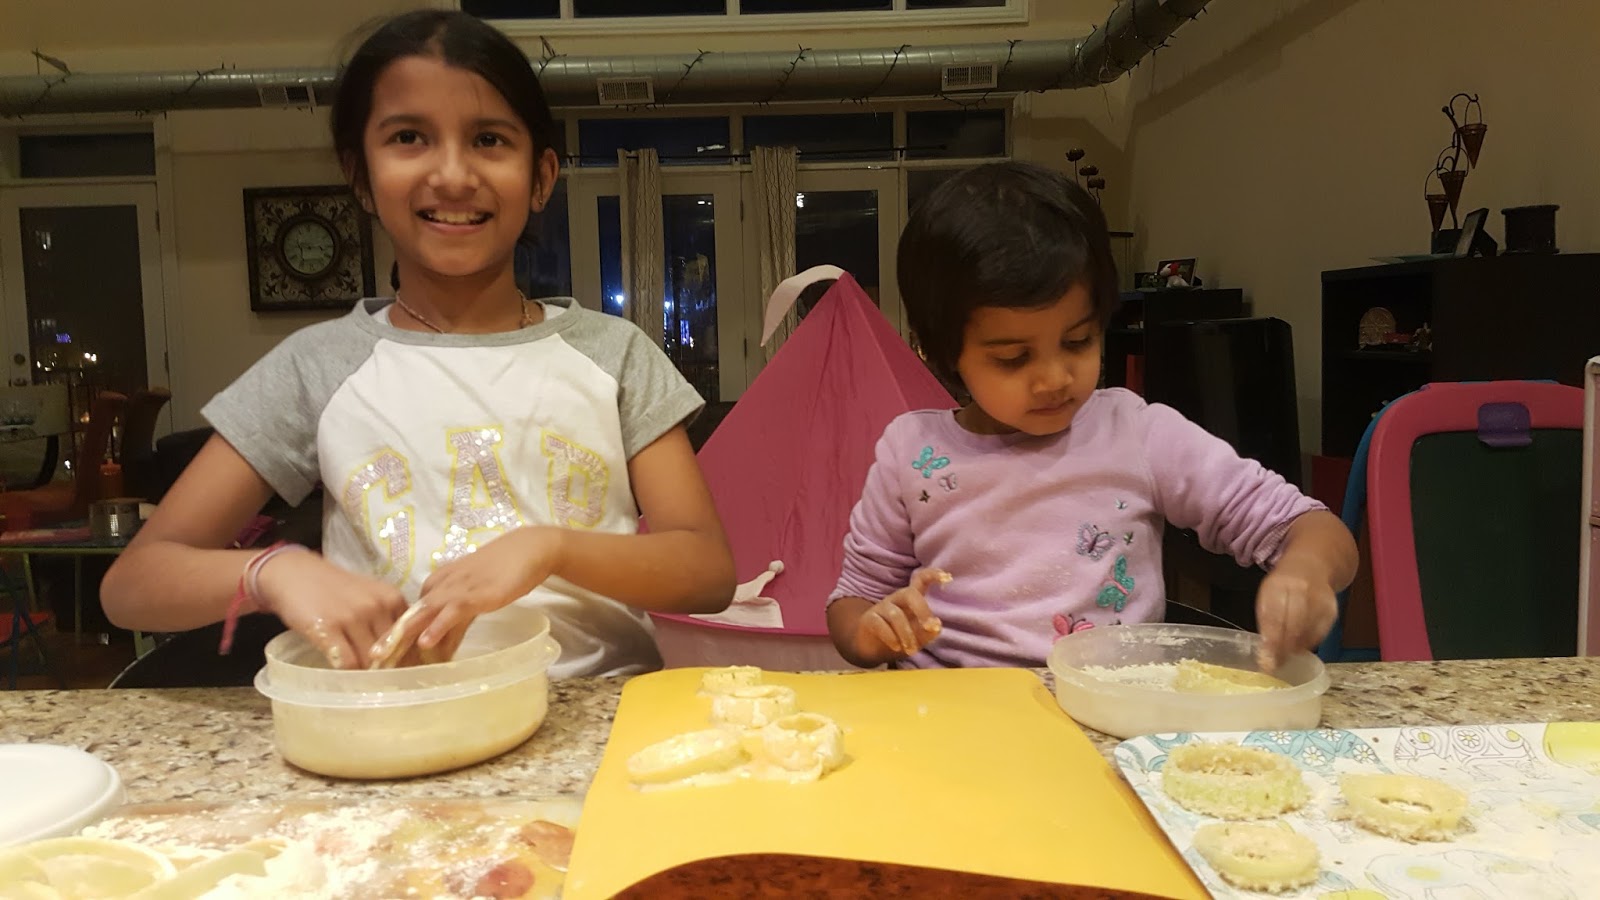
The girls and I try to cook together (mainly in winters!), we have baked cakes,made crumbles, assembled onion rings, executed a "homemade restaurant" and above all we bond over food, over the mess, over the laughter and enjoy the experience. 

Open up your recipe book, have the kids bookmark what they want to eat and go for it! Just be prepared for the mess, eye rolls and lots of deliciousness coming your way!
I highly recommend it!

Tuesday, November 12, 2019

An Impromptu British Evening!


In case you haven't read, Chicago has been cold, unseasonably cold. Which I feel is the story of every year and we forget.

After a long dentist appointment and it being as cold as it was, I just didn’t want to cook. I wanted to go out and break the monotony of us complaining about how cold it is!
As I stood in the cold, waiting for my uber to get home, any "wanting to eat out" enthusiasm I had just fizzled out. So we did the next best thing: Cook and make an evening of it

Cooking is less science and more of the pure passion of eating delicious food.
Simple.
 Case in Point: A friend of mine keeps saying, she barely cooks. But her Paneer Makhanwalla is the best I have EVER eaten. Less Science, more of her passion of eating the delicious food she makes!

At Tagore Villa- Kolkatta
Back to this cold, dreary evening, Sumit and the Little Lady by value of association decided on the menu.
(Deepak means Diya, means rememeber when in Calcutta we went to see how Diay's are made, means remember Calcutta, means remember the Baked  Beans on Toast at Flurry's)
Yep, logic of association makes sense, complete sense ;-)


Flurry's Baked Beans!
The menu decided was "Baked Beans on toast" and headed to the store to get the Special Baked Beans needed for this!
As I got home and waited for them, mind became active and I was likeI need more than Beans on toast: 

How about a "British evening" .The menu expanded to
  1. Baked Beans on Toast
  2. Vegetarian Shepherd's Pie
  3. Which was to be followed by a Cup of Tea! (Never happened, since we have over-stuffed ourselves)


Recipe for "Vegetarian Shepherd's Pie:
Ingredients: 
For Filling
  1. 1/2 cup chopped each
    1. Carrots
    2. Green Beans
    3. Onions
    4. Bell Pepper
    5. Celery
  2. 2 cloves Garlic finely chopped
  3. 2 tsp Butter
  4. Spices per taste: Salt, Black pepper, Dried Oregano, Cinnamon
  5. 3 tomatoes pureed
  6. 2 tsp Maida/ All Purpose Flour
For Topping
  1. 3 medium potatoes boiled and mashed
  2. 1 tsp yogurt or 1 tsp egg-less mayonnaise
  3. 1 cup shredded Cheese
  4. 1/2 cup Panko/ Breadcrumbs: Optional
Process for Filling
  1. On a hot skillet, add butter. Once melted add onions, garlic and sauté till translucent
  1. Add carrots, beans, bell pepper and celery, sauté for 2-3 minutes and cover and let it simmer on slow flame
  2. Puree the tomatoes with the all purpose flour. Feel free to add 1/2 cup water for ease of blending
  1. Once vegetables are tender, add the tomato - flour paste and add spices.
  1. Let it simmer till the sauce thickens, taste and adjust seasoning as needed.
  2. Turn the flame off
Process for Topping
  1. Mix Potatoes, 1/4th cup shredded cheese and the yogurt/ egg less mayonnaise. The consistency should be of mashed potatos.
  2. Feel free to add some salt/ black pepper per taste
Bake:
  1. In a baking dish, layer the filling first.
  2. Add the potatoes on top to cover all filling
  3. Cover with the remainder 1/4 cup cheese, top with panko
  1. Bake in the over for 20 minutes at 375 F.
  1. If you like the top crispier, feel free to leave in the oven for additional 10 minutes

Enjoy with the hungry kids, missing your Brit friends and definitely make a "British Evening" just because!
Fireplace and a warm hot meal with the family!

This was a true hit with the kids and Sumit also approved of this Pie! Even going as far as, we need to make again and admiring: Is this all made from Scratch?
Yes it is, please refer to Recipe above Mr. Hubby so you can make it next time!
Made from Scratch for sure!

Tuesday, January 22, 2019

Quick Food Fix: Shishito Peppers

On the last evening of the long weekend after a busy and yet super fun weekend, we are all ready to recharge the batteries and be ready for what lies ahead.

I decided to end it on a simple yet powerful foodie night!
Kids enjoyed some Hash Browns (one smothered with onions, and the other peppered and seasoned) .I continue to succeed  struggle in the No Potato for a year challenge, but I wanted something fun and easy to cook.

Long behold in the my fridge lied an unused bag of Shishito peppers which my husband had picked up in hoped of us eating.
Well tonight was the night.

I looked up a recipe, surprisingly super easy, as always modified it to fit my needs and then cooked and ate it with earnest. Including my recently turned 11 year old kiddo.

Process: 
1. Wash the peppers (About 10-12) in water.
2. Poke a hole in each pepper. Mainly So when you grill/ char it, it doesn't splutter
3. Heat 2 tsp olive/ vegetable oil in a skillet. I used an aluminium ones, when i researched the recipe, the common theme was DO NOT use non-stick, so I didn't.
4. When the oil is hot (you can test by adding a drop of water, it should splutter), add the peppers
5. Turn every 30- 45 seconds until the "charred" effect comes in. Please note: Charred, not burnt!
6. Take it off the skillet on a plate and garnish with sesame seeds and Rock Salt.


Eat and enjoy!

How was your long weekend?


Monday, November 5, 2018

Monday Bites: Quick Food Fix: Paneer Bombay Style Roll


Research proves that having dinner as a family is a big deal.

I wish I had a "magic wand":  Dinner is piping hot and ready by the time we come home, center candle is lit, and we can all sit peacefully, laugh, chuckle and enjoy the dinner while sharing about how our day went.

Snap.
Yes, a dream, a beautiful yet impractical dream.

So we do the next best thing that we can, improvise the implementation. On most days we will eat as a family and have hot piping food, but just "quicker" and "self effort" filled!

This Roll Recipe has been a hit with the kids and adults equal. It fits my "under 25 minute" rule and is rich, delicious and healthy
Here is a variation with potato I had made a while back" Potato Kathi Roll.


Name: Paneer Bombay Style roll/ Kathi Roll

For Filling
Ingredients
1/2 Onion: Chopped in biggish squares
1/2 Bell Pepper: Chopped in biggish squares
1/2 Tomato: Chopped in biggish squares
1/2 cup Paneer: Chopped in biggish squares
1 tsp ginger
Olive Oil
Spices
1 tsp Jeera
2 tsp Shahi Paneer Mix
Salt: per taste
1 tsp Chia Seeds
1/2 tsp Cinamom

For Roll
Frozen Malasian Paratha
Sliced Onion: 1/4 cup
Bhujia: per taste
Yogurt: less than one cup
Spicy chutney

Process:
For filling:
1. Heat the olive oil and add the jeera
2. Once spluttering, add all other filling ingredients
3. Let it simmer and saute till onions are cooked
4. Mix well: Note you can add 1 tsp of yogurt for a creamy texture.

Assembly:
1. Prepare the Malaysian Paratha on pan per instructions
2. With a butter knife, spread yogurt
3. Add the filling (I also added left over rice, but optional!)
4. Add Bhujia, Sliced onion and spicy chutney/ achaar per taste

Roll in Foil and Enjoy!!!

Here is our version of "Bombay Wraps/ Kathi Roll/ Paneer Roll"


A quick dinner served with style!

Kids devoured it and I shot myself in the foot, supportive husband said: Well, now this we can make at home, so no restaurant needed for the "Roll Fix"

Monday, October 1, 2018

Color me Red- Said the Dinner Plate!

Yep, I could not come up with a smart title for a recipe with Beets, so I came up with "Color me Red"

I have been "unsuccessfully" trying to introduce beets in our cooking/ daily food. I don't know what to cook with it- so more often than not, we buy it, towards the end of shelf life, we either throw it, or cut up and just grudgingly eat it. Neither option sounds appetizing or a good choice.

May be a year or so ago at a casual dinner, my friend made this divine beet salad! We gobbled it up. And I asked for the recipe and she said: "it is the simplest thing ever!"

Beet Salad
Ingredients:
1 Onion: Chopped up in larger chunks
1 Beet: Chopped up in larger chunks (you can boil it to make this softer, which I do)
Salt to taste
Squeezed lemon
Spices: Salt, pepper, Chilli, Chaat masala
Optional:
1 Avocado mashed up.

Process:
Mix it all up and tada!

I was like, what else.. she said that's it!

And man, she was right! That's it.

This was a year ago. Recently, hubby reminded me, make that salad: And I obliged!I have been making this Beet Salad 2-3 times a week. And we continue to gobble it. Well, the kids need a lot of coaxing still! They have agreed on one piece of beet. (Insert eye roll)

To add variations: Sometimes I chop up cucumbers to it, sometimes grate ginger and jalapenos, sometimes skip the avocado!

So now our fingers are more "red" and jokes of "aaah, I cut my finger see, I have blood" are more prominent in the house!

Simple salads help!
What else do you cook with beets?
The next one on my list is roasted beets-arugula-goat cheese salad! Will keep you posted!

Thursday, December 21, 2017

Munch Bunch: Fried Banana Fritters

Munch Bunch: 4 like minded couples meet on a rotating schedule, choose a cuisine to make and experiment with and spend the time to cook, critique and enjoy.

With the kids getting older, they experiment eating it, not all is successful, but hey, which 5 year old can say brag they have tried home made sambussa, or a Spanish ensemble, A Greek Night or a zesty Cranberry relish with a Thanksgiving Feast!!
Mission Successful!

Theme Vietnamese!!! 
And as always it was a feast! This time around, I chose Dessert. I love sweets and desserts and suck at making them, plain and simple! So munch bunch is the best way to experiment!

Fried Banana Fritters!
Honestly, you search for eggless Vietnamese Dessert and this one is the first thing comes up. I was surprised, I always thought of fried banana/ plantains are a South American/ Peruvian thing. Happy to learn

Serves 16 (greedy people!)
I made it in three distinct steps
1. Fried Banana (of course)
2. Caramelized Banana (Since I was being fancy)
3. Assembling (with Vanilla Ice Cream)

You will need Sugar Syrup, This is the best recipe to make this! I did use Brown Sugar though!

Step 1: Fried Banana Fritters
Ingredients:
Banana for frying: 6 medium well done
Wheat Flour: 2 cups (give or take)
Cinnamon: 2 tsp

Process
1. Mash the bananas really well and add flour
2. The batter should be like a thick pancake batter, feel free to add more flour
3. Add cinnamon

Only fry, when you are ready to eat!

Step 2: Caramelized Banana (This step is optional)
Ingredients:
Banana: 2 sliced medium
Sugar Syrup and caramelizing the banana

Process
1. Heat the 6 spoons of sugar syrup in a shallow pan until thick
2. On low flame add the sliced banana, let it crisp and then flip over
3. When both sides are crisp, let it cool off!

Note: This is a time consuming process, you can add caramel, however I am mortally afraid of burning myself with hot caramel, so I stick to sugar syrup!

Though long and painful, I loved how the sugar crystallized over the banana!

Step 3: Assembling

When ready to eat, please fry the banana fritters then, there is nothing better than warm fritters with cold ice cream!

Process
1. Fry the fritters in medium round shapes till brown
2. Place in the sugar syrup for 1-2 minutes
3. In a serving dish
a. Place the warm fritter
b. Top with Ice cream
c. Add caramelized banana

Enjoy!


Thursday, September 28, 2017

If this continues, I will become my mother!


Which is definitely not a bad thing, but still. Man!
So here is the new thing I am doing- Making yogurt at home: Yep bye bye to the store bought convenience and always running out of yogurt! I have started making yogurt in my Instant Pot.

Its a two step process and it is very simple(again I cant believe I am saying this, but it really is)

1. Boil the milk in IP (It has a Yogurt/ Boil Setting), After boiling, let the milk cool for 10 minutes
2. Add the yogurt starter and then set it in IP in Yogurt mode for 9 hours and next am, tada, delicious home made yogurt is ready.

Keep in fridge and enjoy! Please note, we cook a lot with yogurt and hence it really does not last more than 2-3 days, so I cannot honestly comment on home made yogurt's 'Shelf life'

A few pointers: 
1. Milk: I use full fat milk since the yogurt comes off more creamy!
2. Starter: I used an organic greek yogurt starter, got one of those smaller boxes and then for future, I just save some yogurt for the next batch!
3. Boiling milk: Yes you can use microwave to boil milk for 4-5 minutes instead of IP
4. Home made yogurt tastes great and I dont know if its better than store bought! i just like showing off: 'Oh, I make my yogurt at home now'


My older kiddo, the Chatterbox is not a sweet tooth, she will not crave any of the sweet stuff! With trial and error, the one dessert she will eat is 'Srikhand' and now every other morning, i make it for her. Why you ask, its SUPER SIMPLE!

Serves: 2 greedy kids, a bowl each!
Process
1. In a cheese cloth, put 5 big spoons of yogurt and let it hang overnight to let the water drain out
2. Next morning, place the hung yogurt in a dish and add 5-6 tsp of sugar, 1 tsp of cardamom, some kesar, slices almonds and pistachio
3. Fold and fluff and keep in the refrigerator.
4. Enjoy the creamy 'Srikhand' with the kids after a long day at school

Now: Hanging the curd is optional, I like it since it makes my Srikhand more 'thicker', if you skip step 1, its okay, your srikhand will be a little watery, which is fine.

Also Now: Yes after step 2, you can serve immediately, but I like a 'cooler srikhand' and the kesar leaves golden streaks of richness through the day!

So yes, two recipes in one blog post and all about cooking and how simple it is and preaching you should do it...well I am turning into my mother!


Friday, July 28, 2017

Berry Pie- Peach Pie and my cutie pie's


Such a big difference 2 years is making, I swear!
This was us 2 summers ago baking a crumble and fast forward to now.... the girls 9 and 4 are making the pie/ crumble now pretty much on their own and the cherry on top.... they are also cleaning up after!

So here is the Pie/crumble recipe, kids edition!  The girls made two crumble's this past weekend, so except the fruits being different, both of them followed the recipe step by step identical to each other!

Little Lady: 4 year old used 3 cups of berries (Mixed- Blueberries, raspberry - Strawberry)
Miss Chatterbox: 9 years old used 3 larger peaches. She sliced most of them herself
(Yes I was a hawk watching her)

For the rest of the recipe-I will use the term 'fruit' instead of berries or peaches just to keep it simple

Ingredients:

Fruit Base: 
Fruit of choice : See portions above
1 tsp cinnamon
2 tsp brown sugar
1 tsp ginger grated
1/2 tsp vanilla extract (Again, I used the home made one my friend gifted me at Xmas!)

For the crumble topping
4 spoons Bisquick
1/4 cup melted butter
1 tsp brown sugar
1/4 cup milk (I used 2%)
1/2 tsp baking powder

For baking or cooking with kids the best thing I have learned over the years is keep all ingredients, measuring spoons out on the counter and then walk the kids through the process step by step.

Let them lead, ask questions, get messy and above all let them include the variation they want! Of course with that said, i am starting a new tag 'Cooking with Kids'

Make them wash their hands, before, during and after!

Process: 
1. In a ready to bake Pyrex dish mix all the ingredients of the fruit base.
2. Let it stand for 20 minutes for the fruit juices to release well
3. In a deeper vessel, mix all the ingredients for the crumble topping (dough like consistency)
4. Layer the crumble topping on top of the fruit base.

Note: The little one definitely needed help with this steps since her natural instinct was to press the 'dough'. I learned that telling them 'Layer the topping like a blanket on the fruits' worked like a charm!

5. Bake the crumble at 375 F for 20-25 minutes, you could brush the topping with additional butter to make it 'brown' better.

Note: I am paranoid about the oven, so this step I led completely.

While the pie/crumble is getting baked... have the kids clean up.

Both girls washed their hands off after they licked their fingers with the delicious dough topping.

Again the kitchen clean up was a simple one... the older one helped in putting all the ingredients from where they came and the little one helped with wiping the counters and the floor.
And yes, of course I had to wipe up a little more after them, but I really did enjoy them helping me out and taking the initiative of 'Leaving the kitchen as they found it'

The highlight was the girls were sharing with everyone at the dinner party the recipe, the baking process and above all ' I made it, you will love it!'


So go on... let the kids lead a little and you will learn a lot!

Monday, July 24, 2017

Quick Food Fix: Grilled Zuchini Boats

As we improvise our vegetarian BBQ recipes, we have discovered our new favorites like 'Grilled Edmame; Crusted Tofu, Tangy potato' and as we explore new recipes like today's Zuchini Boats..... the one main BBQ item that has been dropping off our menu is the Vegetarian Burger.

Imagine a BBQ with no burger and you are still full!
To be honest, a Trader Joe's masala burger is a staple in my house, I love it! This is the one frozen ready made food that i actually keep stocked for those days when I just want to do nothing with cooking and still eat at home.

When we started with grilling, we will make a few variations and then stick to the tried and tested Vegetable Burger as a main... however in the past 6 weeks of grilling (We grill at least twice a week), I have made the vegetable burgers only once!

So our BBQ sessions are interesting for sure even sans the burger! Here is the new 'concoction' Grilled Zuchini Boats!

Serves 6-8 adults as a side

Ingredients:
Zuchini (But of course): 3-4 medium length

Stuffing:
Corn (husked from the cob): 1 or frozen corn 1 cup
Note... its summer, enjoy the fresh husked corn, the frozen ones can be used in winter!
Onion: Medium: Finely chopped
Pepper: 1 medium: Finely chopped
Seranno Pepper: Per taste, finely chopped
Pesto Sauce : 3 tsp
Spices:
Per taste: Salt, Pepper, Chilli Flakes

Toppings
Goat Cheese: crumbled 1/2 cup
Shredded Cheddar Cheese: 1/4 cup
Basil: Finely chopped: 1/4 cup


Process:
1. Wash the zuchini and Slice it in the middle length wise
2. Core the centre and save the pulp

3. Stuffing: Mix all the ingredients along with the zuchini pulp and the spices
4. When the grill is hot, on the grill mats place the stuffing for 3-5 minutes and toss once or twice.
5. While the stuffing is getting cooked, place the sliced and cored zuchini on the mat as well.
5. When the stuffing is ready, : Stuff the stuffing (no pun intended) on the zuccini boats and and top with the cheese mix

6. Grill the stuffed boat for another 2-3 minutes and tada!!! Ready, the finely chopped basil helps to elevate the look

Enjoy as a warm accompaniment on your grilling evening.
And yes vegetarian grilling/ BBQ parties are a thing! We are living proof.

Thursday, July 20, 2017

Quick Food Fix: Paneer Tikka Masala

Another grill edition and definitely a super hit with Indians and even my local American friends.
I used home made Paneer for this round, but you can use store brought one like I have done for the past 14ish years!

Serves 4

Ingredients:
1. Bell Pepper 1 Medium: Quartered in chunky pieces
2. Yellow Onion 1 Medium: Quartered in chunky pieces
3. Paneer: Quartered (You can adjust the amount of paneer based on your taste, I say, more then merrier)
4. Tomato 1 Medium: Quartered in chunky pieces
5. Ginger: 1 tsp grated
6. Garlic: 2 cloves grated
7. Yogurt: 3/4 cup

Herbs & Spices
1. Paneer Tikka masala (Easily available in Indian Store/ Whole Foods): 2 tsp
2. Seeka hua Jeera: 1/2 tsp
3. Red Chillo Powder: 1/2 tsp
4. Sookha Pudina: 1/2 tsp
5. Rock Salt: 1/2 tsp
6. Salt & Pepper: Per taste

Garnish:
1. Chopped Cilantro: 1/2 cup
2. Squeezed Lemon Juice: Per Taste
3. Chaat Masala: Per Taste

Process:
1. In a mixing bowl, mix the yogurt with all the spices and ginger, garlic
2. Once all is mixed, add Onion, Bell pepper and Paneer (Not the tomato)
3. Mix well and ensure everything is coated well
4. Now add the tomato and toss lightly
5. Marinate for at least 30 minutes in the fridge

Note: If you leave the marination overnight, skip adding the tomato's since tomato releases the water, it will make the marinate 'thinner'

To Cook:
On Grill: (Perfect for summer) Save some of the marination, and layer the tikka on the grill mats. Cook for 4-8 minutes and ensure to flip the vegetables and paneer to cook evenly

Alternatively: You could add them to presoaked skewers, I generally forego this step since it adds more prep time and for gobbling them down, have to take them off the skewers anyways.

In Oven: (Perfect in winters)On a slightly oiled foil/ oven dish add the paneer tikka and cook at 375 F for about 20 minutes

On Stove Top: (Least Recommended)Add 1 tsp of olive oil in the pan and then add vegetables and Paneer, Let it cook for 5-10 minutes on medium flame. Please note in this method, the vegetables tend to get softer and the paneer will not have the 'crunchy exterior'

Garnish with the toppings and any leftover marinated yogurt and enjoy!

Tuesday, July 18, 2017

Home Made Paneer, Yes Please!

With young kids in a vegetarian house hold, Paneer (Think of it like a dense cottage cheese)very easily becomes favorite. Its' high in protein and calcium, very easy to cook and above all the kids will eat it in any form possible. And vegetarian or not, Paneer is one of the easiest to cook with after potatoes of course.

Over one of our countless BBQ sessions, a friend mentioned that she makes the paneer at home and its super easy. I was laughing and had the 'No way in hell' look and she said trust me. And I did trust her, noted her process down and then and I attempted it we had amazing home made fresh paneer with a simple-process.

Process in Instant Pot (Adapted from my friend’s recipe)
1. In IP: Yogurt-Boil Mode, boil 1/2 gallon of whole milk (Whole milk will yield more paneer!)
2. When milk is boiled, in a cup mix 1/4 cup vinegar and 1/2 cup water. Add it to the milk
3. The milk separates from the whey. Stir a little more. You can save the whey for other uses(!)
4. Strain the curdled milk using a cheese cloth, just hang the cheese cloth with the curdled milk for about 30 minutes for additional water to drain out.
5. This is the soft paneer. However most of my recipes call for the firm paneer, Wrap the curdled milk in the cheese cloth, keep a heavy weight on top overnight to squeeze out any additional liquid.

Ta-da Paneer is ready. You can use it right away, however I recommend keeping in the fridge for about 24 hours especially if grilling with it, just so that it hardens up a little.


FYI- I used instant pot, well because its super easy to clean .... and then I was in a mode, so boiled the entire gallon of whole milk, used 1/3 rd for paneer, 1/3rd for making yogurt and 1/3rd for making Indian Ice Cream- Kulfi!

FYI- If you are using a regular stove top for boiling milk, the word on the street is, add 1/4 cup water to the pan before you start boiling the milk, it helps in not having the milk stuck on the stove top pan.

We of course used the home made paneer for grilling as Paneer Tikka and I realized the home made paneer was softer (less chewy) and above all; I was just crazy excited that it was home made. So the child in me took over and I ensured that the family tasted the paneer


Of course this needs to follow with an easy breeze quick paneer tikka recipe for Grilling of course! Coming Soon- I Promise.


Tuesday, July 11, 2017

Silly Races and A picnic

The tradition for Munch Bunch is simple.... 4 foodie families meet once every 4 to 6 weeks and try to cook a new themed menu to test different menu's and just explore a little outside our comfort zone. We have attempted Greek, Vietnamese, Indian Area Specialties, Ethiopian, Burmese.... aah so many more!
This month's theme was ..... 'Silly Races and a Picnic'.

With summer in Chicago, heading to the beach/park/somewhere outdoors is a must and miss Chatterbox decided that having silly races would be the perfect way.... so 12 adults, 8 kids ranging from 3 months to 9 years all headed to one of the Chicago Beaches right next to a park with all the picnic gear is full force.

Silly Races: Miss V made a list of 11 races and we managed to play 1: Lemon in a spoon race which was awesome fun! But we did play lots of Frisbee, catch the ball, cricket, walking on the beach, Simon Says and just having kids run around as we sat and caught up and just enjoyed sitting on the mats and soaking in the wonderful lake breeze.

Menu:
To begin with crunchy Vegetable Pastry Puff followed by Potato Kathi Rolls just reminiscent of the Mumbai infamous street food and then a delicious take on the Bahn Mi sandwich.
Of course for dessert we had a cake and to celebrate the American Independence Day ... a gorgeous cake.
For drinks this time since we were at the beach, we had lots of water, juices to keep it simple.


Kathi Roll/ Frankie:
This is a Mumbai special and totally reminds me of a simpler time walking on Breach Candy with my friends and asking the Rajesh Frankie wallah, please make it spicy! And then giggling along with friends and walking a lot more.

Makes 16 Frankie’s

Ingredients
Yellow Potato: 10-12: Boiled, peeled and mashed well
Yellow Onion: 2 thinly slices
Garlic: 3 cloves finely chopped
Ginger: 1/4 inch finely chopped
Serrano Peppers: 3-6 finely chopped
Cilantro: 1 cup finely chopped
Olive Oil: 3 tsp
Spices
Jeera: 1 tsp
Turmeric: 1 tsp
Chilli Powder: 1 tsp (Use more to make it spicy)
Amchoor: 1 tsp
Chaat Masala: 2 tsp
Salt: Per Taste
Black Pepper: Per Taste

For Garnishing
1 Red onion: thinly sliced and marinated in 2 tsp chaat Masala
6-8 Serrano Peppers: Chopped well and marinated in 1 cup vinegar
Garlic Chutney: Readily available in Indian stores or homemade =
Tortilla: All purpose tortilla - 16

Process:
Making the Stuffing
1. Heat the olive oil and add Jeera till it splutters
2. Add the onion, ginger, garlic, serrano peppers. Sautee for 5-7 min. (till onions are translucent)
3. Add all the spices and cook for 2-3 minutes
4. Add the mashed potatoes and mix well, cook for another 5 minutes add cilantro and turn the flame off.


Assembling
1. On a flat bottom pan, heat the tortilla till warm
2. Spread the garlic Chutney
3. Place the cooked potato in the center, top with marinated onion and chilli-vinegar.
4. Roll like a burrito and sprinkle with chaat masala if needed


I covered with parchment papers since I wanted to keep it simpler to pick up and eat at the picnic, this is a wonderful idea for school lunches as well, since quick to grab and eat and you can include choice of vegetables as a filling. The best part of this Kathi roll/ Frankie was....is... it reminds me of home. 
Enjoy!

Monday, July 10, 2017

Quick Food Fix: Grilled Corn Crostini

Let's make your vegetarian grilling more fun !

Now, we all know that without corn, the grilling is too boring. But corn on the cob gets too boring and too filling after a while.
So here is our new variation of consuming the corn!

You could either use kernels from corn or even frozen ones, I used the kernels fresh off the cob since, well I was in the mood of adding more work for myself!

Serves: 6-10 as a side

Ingredients
French Bread: One loaf, sliced 1 inch wide
Goat Cheese: 8-10 tsp
Corn: 1 cup kernels
Cherry Tomatoes: 1/2 cup sliced half
White onion: 1/2 cup finely chopped
Fresh Basil: 1/4 cup finely chopped

Marination
Pesto Sauce: 2 tsp (You could make fresh or use any of the nice store brought ones like I did)
Olive Oil: 1 tsp
Salt, Pepper, Chilli Flakes per taste
Note: If you like your food slightly spicier, i highly recommend adding  Chili Oil as a topping.

Process:
1. Mix the onions, corn and the marination ingredients and let it sit for 5-10 minutes
2. When the grill is hot, let the vegetables grill/ crispen for about 3-5 minutes. Take off the grill
3. On the sliced bread, spread a generous amount of goat cheese.
4. Top the bread with the grilled vegetables and garnish with Basil

Enjoy the perfect cold-warm crostini!

Now, FYI-I highly recommend using these grill mats, they are amazing and the corn kernels don't fall off and above all very easy to clean! We use these mats all the time!

Variation: If you want to make the crostini in the oven instead of grilling, the setting should be broil, and let the vegetables cook for 5 minutes! Layer and enjoy

The fun about Crostini's is it looks amazing, is simple to put together and is a lot of fun to sample variations!

Thursday, July 6, 2017

2017 Summer: BBQ Edition

Summer in Chicago is short lived and because of this, we make every minute count! Every single evening needs to be outdoors, getting wet in the ample water areas in the city parks or simply enjoying the breeze on the deck with some BBQ.
As a vegetarian, I get puzzling looks when I am asked... what do you grill?
Just so you know.... we have BBQ'ed 3 times in a row this July 4th weekend, so if anything, we really do try to mix it up on the menu to not get repetitive. And my list of grilling recipes is growing furiously!

Continuing the tradition of last year and adding recipes in the mix... here is our new concoction for Tangy Potato's. Per my MIL who is visiting from India, it’s her favorite!!!

Recipe: Serves 6 greedy adults!
Golden potatoes 8-10 cut in wedges (Don’t make them too thin, since the grill will burn them)
Marinate Ingredients:
Olive Oil: 6-8 tsp
Spices:
Red Chili- 2 tsp (If you like it spicy)
Dried mint powder - 1 tsp (You can even take fresh mint and chop it up finely)
Salt: 1 tsp
Chole Masala: 2 tsp (Available at Whole Foods, Indian Stores)
Chaat Masala: 1 tsp (Available at Whole Foods, Indian Stores)

Process:
11.      Mixes Potato with the marinate ingredients and let it sit for 15-20 min
22.      Grill for about 5-10 minutes, you need to turn it with the grilling spatula soon!

Feel free to season with Squeezed lemon and add in additional salt from top as needed.


Enjoy as a side, or use this as a burger patty or just binge on it while you wait for the rest of the food to grill up!

Wednesday, June 28, 2017

A Salsa kind of night

First things first... pictures below are borrowed from Internet....... We were super hungry so gobbled up the food prior to the pictures..
It's a weeknight and with grandparents in the house, there has been a lot of Indian food. The kids, the grandparents and us, we all needed a break... So Mexican menu with its flair of spice and its simplicity of 'assembling' was perfect!

We cooked in the house and then took everything on the deck to enjoy the weather, play games and enjoy the food- the summer way!

Menu:
Nacho: Tortilla chips smothered with cooked black beans, salsa, cheese and Guac
Taco: Toasted shells with black beans, roasted vegetables and all toppings
Quesadilla: The black bean quesadilla with Guac is the perfect combination
Accompaniments: Pico De Gallo, Salsa Verde and Guacamole along with finely chopped Habanero chilies, Cilantro and of course lettuce!

And trust me when I say this, my family loves Mexican food and the best accompaniment to the Mexican food is the 'Fresh Salsa' So make small portions and enjoy! Here is my recipe for the quick Salsa Verde....

Portion: 1 cup
Ingredients:
1. Green Tomatillo 4-6 washed and quartered
2. Garlic Cloves: 2 peeled and washed
3. Jalapeno: Sliced and De-seeded: 1 (If you like it spicier, feel free to use Habanero Chili)
4. Spices: Salt, Black pepper: Per Taste
5. Olive Oil: 2 tsp


Process:
1. In a flat pan, heat the olive oil
2. After 1-2 minutes place all the ingredients in the pan for 'pan roasting/ Fire Roasting'
3. The flat heated pan helps in 'charring' the ingredients which is what you want
4. After 3-4 minutes, place the lid on the pan to let the tomatillo juices flow out and get cooked
5. Turn off the flame and let it all cool
6. Pulse in a food processor for 1-2 minutes.

Note: I like my salsa, chunkier to I don’t pulse it too much

Note: Tomatillo is quiet tart by nature, so cooking it well makes it tangy and reduces the tartness, you don’t need additional lemon.


If you don’t have Tomatillo you could fire roast the red tomatoes, however you do need to be careful since tomato is juicier than tomatillo so cover the pan sooner, you may add lemons to the red... needless to say, this will not be 'Verde' 

Monday, March 13, 2017

Sometime I get fancy without trying...

.....or rather I get fancy when I make a mistake.

Now Mac N Cheese, at times is like the quick fix dinner on those days when you'd rather not do anything else. The Aunt Annies's and the veggie loaded Mc N. Cheese quiet a staple in our family for the simplicity of it.

Blob of the pasta!
The other evening, Sumit said, lets make the mac n cheese from scratch instead, and it had been a while, and I said why not. Long story short, my pasta/ mac n cheese looked like a 'blob' of too much sauce and over cooked pasta. I was quiet confident that the kids and me would not like to eat it. Sorry, we are vain that way, food needs to look good.

That evening, I was on the mend from a nasty flu and was in no mood to start over or even order in. So the brain sparks flew and 'Mac N Cheese Balls' were born!

Mac N Cheese Balls Recipe
1. 3 bowls of cooked Mc N Cheese (it being gooey and sticky is not required)
2. For crisping: 2 cups Panko, 1/2 cup shredded cheese, 1/4 cup finely chopped parsley
3. Oil for roasting/ crisping the Mac N Cheese balls

Note: I have this cup pan which makes quite a lot of things in my kitchen, and is non stick, so easy to clean and its an amazing alternative to frying. It gives amazing round shaped whatever you want with 1/10 of the oil needed for frying. I have made, Veg. Manchurian, Kofta Balls, Lauki Kofta, Appa, and now mac n cheese balls!


Process
1. Mix all ingredients of the crisping and lay it in a flat plate
2. Let you ready to eat Mc n cheese cool down and make balls of it. Roll it in the crisping flour (Panko, Cheese+ herbs)
3. Heat the pan, and place a little oil add the ready to cook balls and let it get crisp (Yes you can fry them as well, but then you will need more panko and more oil.... and more time in the gy ot burn it off!)
4. It takes about 2-3 minutes to get crisp on each end

Note: Since Mc N Cheese is soft, you have to be careful in turning the 'balls over'. One can even make a 'Mc N Cheese' patty/ burger on a regular pan, like this Falafel recipe of mine. and enjoy!!


The girls and us loved it. I think Miss V was excited to have 'appetizers for dinner' and Miss Chatterbox S loved dipping this in Ketchup and enjoying!


For me, I enjoyed the 'fanciness of cooking' and getting complimented 'Such fancy every day cooking mom'

Monday, February 13, 2017

Homemade Granola Bars

Mornings are rushed and I should be the 'good parent' and say, my kids eat a healthy wholesome breakfast, but reality is very different. They are generally chugging milk down, or being coerced to finish the last few bites of the cereal/ oatmeal. every single weekday.

I have no issues if they eat in the car, and fruits and the kids cereal bars are our go to energy boosters in case we are really running late or in between school and classes. I have a bag now in the car just dedicated to collect the orange/banana peels and cereal bar wrappers. And it gets filled up really fast!

I used to feel guilty about this, now I dont. It is what it is! So yes, I am the best mom my kids can get!

Recently I was wondering, these granola bars whould not be that hard to make! And well after researching eggless versions, i combined a few recipes to 'try making' this.

Honestly, start to finish (except cooling time), it took my little lady and me only 20 minutes to make, which was really awesome!

Makes 8-10 cereal bars.
Ingredients
1 heaping cup packed dates, pitted (deglet noor or medjool)*
2 pouches of Instant Oatmeal (If you have steel cut/ rolled oats: crisping time is longer)
1/2 cup mixed nuts, chopped : We used almonds and cashews (Other recipes I reviewed had pistachios, walnuts, hazelnuts etc.)
1 1/2 TB butter
1/3 cup honey
2 TB brown sugar
1 tsp vanilla extract (A dear friend had gifted me home made vanilla extract for Xmas, delicious!)
pinch of salt
1/2 cup craisins (or raisins)


* Note: If your dates have become hard for being in the fridge too long like mine, don't worry, just put the dates in hot water for 4-5 minutes and they will be 'hydrated'

Step by Step Process: 
1. Process dates in a food processor until small bits remain (about 1 minute). It should form a "dough" like consistency.
2. Toast your oats and the nuts in a 350 degree F (176 C) oven for 10-15 minutes or until slightly golden brown.
Note: Toast them in different pans, its quicker!
3. In a small saucepan, combine the butter, honey, brown sugar, and vanilla. Bring to a boil over medium heat, while stirring. Cook and stir for a minute
4. Place oats, almonds and dates in a large mixing bowl
5. Stir the warm butter and pour over oat mixture and then mix, breaking up the dates to disperse throughout.
6.  Add craisins
7. Once thoroughly mixed, transfer to an 8x8-inch baking dish with parchment paper so they lift out easily.
8. Press down firmly until uniformly flattened - really pack the bars
9. Bake for another 15-20 minutes. Now this is optional step, i did make mine for additional crispiness. If you choose not to re-bake, please put this is refreigerator to cool.
10 Remove bars from pan, let it cool overnight and chop in 'cereal bar' length

To store: I cut the parchment paper around each bar just to avoid them sticking to each other and also because I was feeling 'fancy' and kept in an airtight box.


These turned out delicious and in the morning, it was not the kids who devourved them but us. But yes, I am definitely planning to make more variations of these. I will always have the store baught ones in car, but for mornings, this may go really well with my 'luke warm' coffees

Friday, February 3, 2017

Quick Food Fix: Crusted Tofu

Breakfasts on weekday's in my house is cereal/ oatmeal for the kids. A hot coffee which becomes warm by the time I get to it and then a lot of 'running out the door'

Yes, Yes I know, breakfast should be the biggest meal yada yada yada. I swear whoever came up with that either woke up at 5 to ensure that happens or just preached and didn’t practice. 

So yes, breakfast is definitely not the biggest meal in my house, it’s just the most rushed!

However, the other day, I had an extra '20 minutes' at hand! so instead of sitting and sipping on my hot coffee, I said let me try this 'Hot breakfast on a weekday thing'

It worked out, it was quick to put together, was delicious and well I did enjoy it. However, it was once in a blue moon thing of a weekday breakfast for me, definitely hard to keep up. 

Recipe for the crusted tofu


Ingredients: 
1 package extra-firm tofu

Wet ingredients:
3 tsp All purpose Flour/ Chickpea Flour
¼ teaspoon kosher salt
Water to mix

Dry ingredients:
3 tablespoons panko bread crumbs
2 tablespoons white sesame seeds
1 tablespoon black sesame seeds (Takmariya)
2 tsp Crushed Peanuts (optional)
Salt, pepper, red chili as per taste 

Oil for toasting/ frying on a pan
Scallions, sliced 


For the nuoc cham: Dipping Sauce:
1 tsp hoisin sauce
2 tsp soy sauce
1 tsp chilli sauce (optional)
2 red Thai chilies: thinly sliced


INSTRUCTIONS
Optional: Drain the tofu for as much time as possible — 20 minutes to an hour. It makes the crisping portion quicker, however if you don’t drain no worries, just let the tofu crisp for a few more minutes!

The nuoc cham/ Dipping Sauce: 
In a medium bowl, mix all the ingredients! Ta Da

Prep: 
1. Mix Chickpea flour/ All Purpose flour with 1 teaspoon of water to a smooth and runny paste. 
2. Mix all the dry ingredients in a plate.

Process
1. Cut the drained tofu into cubes
2. Submerge the tofu into the Flour-Water mixture,
3. Then coat the tofu in the sesame-panko mix.
4. Repeat with the remaining cubes
5. Heat a large nonstick frying pan over medium-high heat and add about 2 to 3 teaspoons of oil. 
6. Place the tofu cubes into the frying pan. 
7. Crisp tofu slices for about 3 to 4 minutes a side, then transfer to a serving platter. 
8. Garnish with scallions. 


Enjoy a healthy, quick to put together 'dish' with the dipping sauce. 


Full disclosure, I feel this would be a better appetizer recipe, it was filling for breakfast for sure, however the flavors are strong and I had 2 breath mints before work to ensure that no one else knew about my 'breakfast of a king' mood!

Monday, January 9, 2017

Life gives you onion... you make Onion Rings!

When its crazy cold and you really don’t want to go outside for anything... what do you do

Option 1: Sulk and complain of how cold it is
Option 2: Make Onion Rings!
This weekend, one of those Chi-beria days, we got together as a family to make Onion Rings from scratch.

'Why onion rings' you ask.... well, Miss V, my chatterbox, her birthday is around the corner and she has a 'List of things to celebrate' and onion rings was one of them.
Secondly, I really didn’t want to 'Sulk' one more time! So this was a perfect family activity to do!

Now, finding an egg-less/ beer free recipe which was workable by kids was tough... so I googled, combined 3 recipes to make our onion rings which came off AMAZING

To make life simple for you.. and for me to be able to find my own recipe, here is the recipe that kids can make with you.


Ingredients
A Chi-beria kind of day.. is not necessary to make these
1. Large White Onions: 2: Cut into 1/2 inch slices/ Rings
Recommendation: To avoid 'crying' while cutting onion, after peeling the onion, wash them in cold water. It helps reduce the tears

Dry Coating
1 cup Besan (Chickpea flour)
1/2 tsp salt

Wet Coating
2 cup besan (Chickpea flour)
Salt - per taste
2 tsp Oregano
2 tsp chilli flakes (optional)
2 cloves garlic (Finely chopped)
Milk- you will have to add to get the right consistency (~ 1.5 cup)
2 tsp baking soda

Top Coating
2 cups Panko Breadcrumbs
You could use any other type of bread crumbs as well, I used Panko since I love the crispiness on frying that it offers

Oil for frying

Garnish: Sea Salt or Chaat Masala

Kids Edition Process
I followed this recipe with the kids, so it created a bigger mess... but in my mind, no mess, no memories!!
We set up a manufacturing line on the kitchen platform
1. First kid dry coats all onions,

2. Second kid dips the coated onion ring in the wet batter
3. The first kids comes back to dip the battered onion in panko

4. Mommy happily fries the onion rings
5. Daddy happily sprinkles with the chaat masala and prepares for a movie evening while we all gobble up the onion rings together!


Detailed Process
1. In a mixing bowl, mix the dry coating ingredients: besan and salt
2. Coat the sliced onions with the flour and place the onions on a tray
3. Except the baking soda, mix all the wet coating ingredients in another mixing bowl
4. Add milk slowly, the consistency of the wet ingredients should be a little thinner than pancake batter
5. Now add the baking soda and mix
6. Dip the flour coated onion in the batter and place on a tray
7. Now dip this battered onion ring in the plate of panko
8. Coat evenly and then fry
Recommendation: Fry on medium flame so the onion ring cooks more evenly. You will have to turn the onion ring at least twice to fry from both sides
9. Sprinkle with sea salt/ Chaat Masala and enjoy!

Sp yes, when life gives you Onions... you make Onion Rings!